
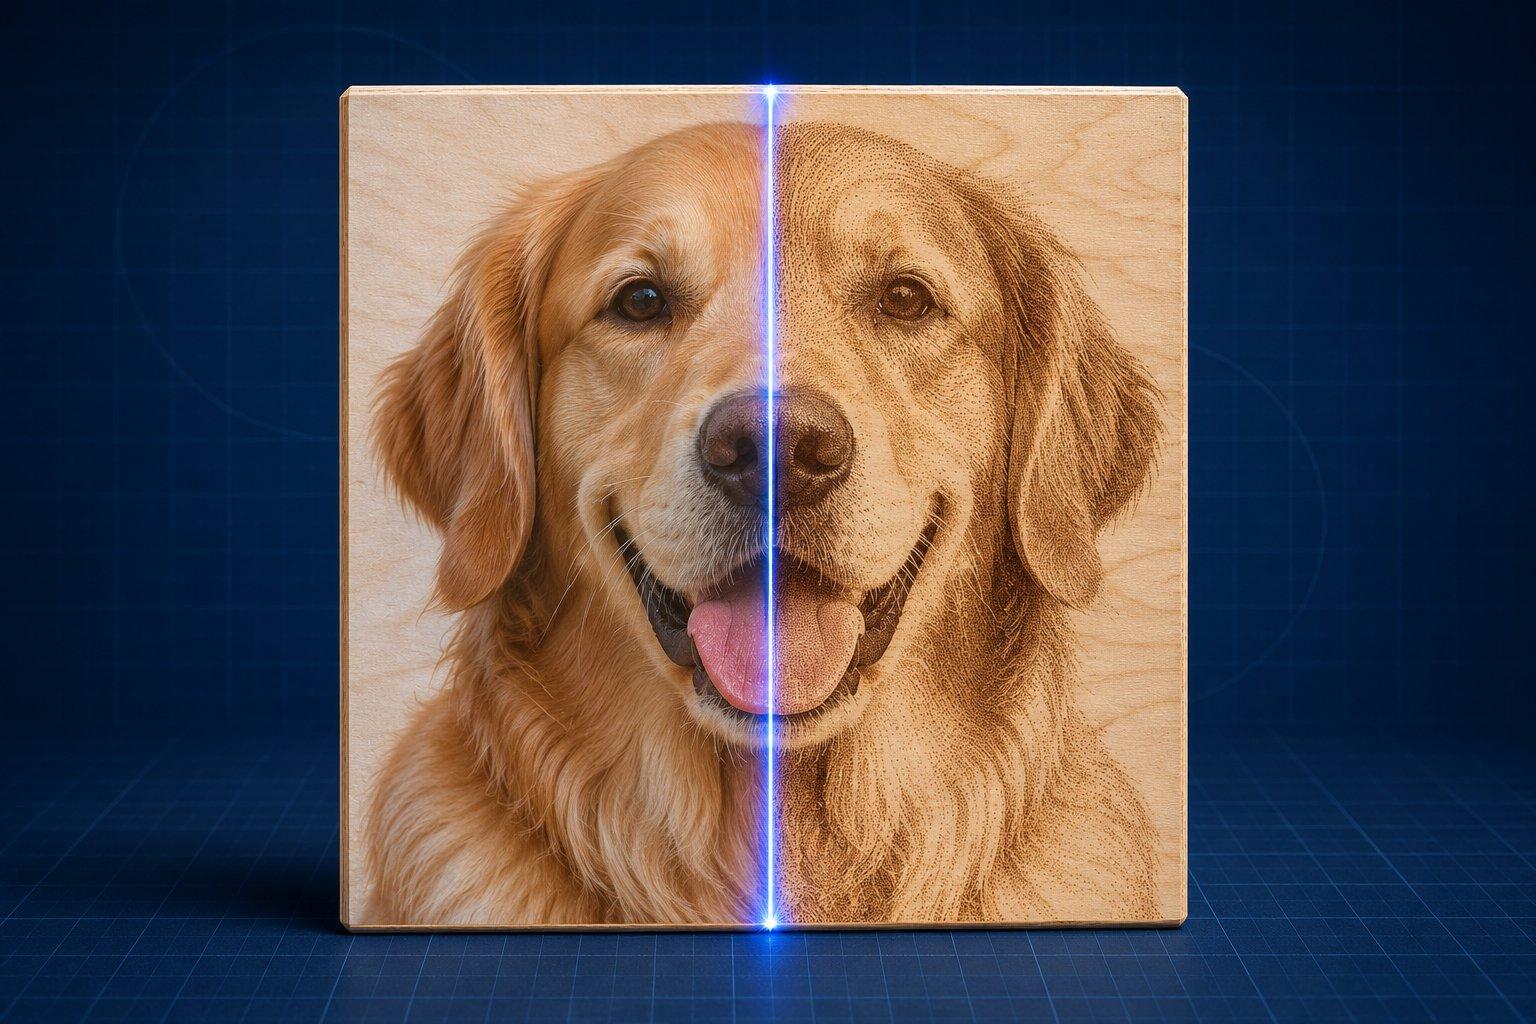
To laser engrave a photo, crop it to the final physical size, resample it to the resolution your laser can actually resolve (DPI = 25.4 ÷ line interval in mm, usually 254 to 333 DPI on wood), convert it to grayscale, adjust contrast and gamma for the material, sharpen it, then dither it with Jarvis or Stucki and engrave at a power that only just marks the surface.
Most failed photo engravings are preparation failures. The laser did what the file told it to, and the file asked for tones the material cannot show. This guide follows the workflow in order, explains the image modes from LightBurn's own documentation, and lists what changes on wood, slate, glass, anodised aluminium, leather and acrylic. Every number is a starting range taken from manufacturer sources. Burn a small test on an offcut of the same material before the real piece.
Photo engraving starting points by material
| Material | Lasers that mark it | Image mode to start with | Starting resolution | Invert the image? |
|---|---|---|---|---|
| Light wood (maple, birch, basswood) | Diode, CO₂ | Jarvis or Stucki | 254 to 333 DPI | No |
| Vegetable-tanned leather | Diode, CO₂ | Jarvis or Stucki | Start at your wood value | No |
| Slate | Diode, CO₂ | Jarvis or Stucki | Your Interval Test result | Yes |
| Glass | CO₂ or UV directly, diode only with a coating | Ordered or Jarvis | 300 to 500 DPI | Usually yes |
| Dark anodised aluminium | CO₂, fiber, diode (surface mark) | Ordered or Stucki | 600 to 1,000 DPI on a fine CO₂ spot | Yes |
| Cast acrylic | CO₂; diode on dark opaque sheet only | Ordered or Stucki | 500 to 600 DPI | Yes on black, mirror when engraving the back of clear |
The resolution figures are Trotec's published guidance for CO₂ machines, and Epilog independently calls 300 DPI the practical middle for wood, glass, marble and plastic. Anything above about 333 DPI assumes a spot small enough to resolve it. A diode with a 0.08 mm spot gains nothing from a 600 DPI file.
Step 1: Pick a photo that will survive the process
An engraving shows far fewer tones than a screen, so the photo has to carry its subject with light and shadow rather than colour. Look for four things:
- Even light on the subject. Trotec's example of an unsuitable photo is an underexposed group shot: the people engrave as one flat surface because the detail sits in shadow.
- A full range from light to dark. Epilog warns that large areas of a single tone engrave poorly, particularly on wood.
- A subject that fills the frame and separates from the background. A busy background competes for the same few tones, so remove or blur it.
- Real resolution. Start from the original file, not a screenshot or a messaging-app copy. Trotec is blunt about this: scale large images down, never enlarge small ones.
Step 2: Crop and resize to the final physical size
Decide the engraved size in millimetres first, then crop to that aspect ratio. Resizing after dithering destroys the dot pattern, so the physical size has to be fixed before anything else. The pixel dimensions you need come from the next question.
What DPI should you use for laser photo engraving?
Use the DPI that matches your line interval: DPI = 25.4 ÷ line interval in mm. A 0.10 mm interval is 254 DPI, 0.08 mm is about 318 DPI, and 0.0762 mm is 333 DPI. The right interval is the one where neighbouring scan lines just touch, which depends on your laser's spot size and on how much the material spreads the mark.
Spot size sets the floor. xTool, for example, lists a 0.08 × 0.06 mm spot for its 20 W S1 module and 0.08 × 0.10 mm for the 40 W. If the scan lines sit closer together than the spot is tall, each line burns over the last one. LightBurn's Interval Test documentation describes the result: engraving time rises sharply and images turn dark and muddy. Too wide an interval leaves gaps between lines.
The material then pushes the number coarser. Trotec notes that on wood and glass every raster dot ends up larger than it is in the graphic, which is why 333 DPI is enough there, while anodised aluminium holds 600 to 1,000 DPI because the dot does not grow.
A worked example. You want a 150 × 100 mm portrait on maple. LightBurn suggests testing intervals from 0.08 to 0.16 mm, and your test square looks cleanest at 0.10 mm. That is 254 DPI. The file should be 150 ÷ 25.4 × 254 = 1,500 pixels wide and 1,000 pixels tall, one pixel per laser dot. A 4,000-pixel phone photo is scaled down to that, which is fine. A 600-pixel thumbnail would be stretched 2.5 times and engrave soft.
Higher DPI also costs time. In Epilog's published comparison on anodised aluminium, the same photo took 2 minutes 44 seconds at 600 DPI and 1 minute 49 seconds at 400 DPI, with a result Epilog describes as nearly as good.
Step 3: Grayscale, contrast, gamma and sharpening
Convert to grayscale, then shape the tones for the material. A file that looks slightly harsh on a monitor often engraves best.
- Contrast and levels. Trotec's guide uses two opposite moves. For a flat, low-contrast photo, clip the input range so the darkest and lightest tones become true black and white. For a good photo on a difficult material, compress the output range instead. Its wood examples pull pure white down by about 30 levels (255 to 225) so foreheads and noses receive a light raster instead of bare patches, and remove the 60 darkest levels so hair does not burn into one black mass.
- Gamma. This moves mid-tones without touching black or white. In LightBurn, 1.0 is neutral, lower values lighten the mid-tones and higher values darken them.
- Sharpening. Apply an unsharp mask last. LightBurn calls it Enhance, with Radius, Amount and Denoise controls. A larger radius makes the image read more like a drawing, which helps on wood. Trotec cautions against a high radius on anodised aluminium, where the material is sharp enough to reproduce every skin blemish.
You can do all of this in three places. LightBurn's Adjust Image window shows the source and the processed result side by side and saves presets. The free Voxelase photo to laser engraving converter sets the physical size and DPI, applies a material preset and dithers in the browser, with nothing to install and no upload. Imag-R, covered below, automates the same steps with material presets.
Should you dither a photo or engrave it in grayscale?
Dither it in almost every case. Dithering turns gray into a pattern of identical dots, so the laser fires at one calibrated power and tone comes from dot density. Grayscale mode instead varies power from pixel to pixel, which only works when the material darkens in proportion to power. Slate, glass, anodised aluminium and coated metal are close to marked-or-unmarked, so power steps have little to show.
| Laser | Recommended for photos | Grayscale mode |
|---|---|---|
| Diode (10 to 40 W) | Jarvis or Stucki on every material it can mark | LightBurn notes it can give good shading on diodes. Worth a test on wood and leather. |
| CO₂ (40 to 60 W and up) | Jarvis, Stucki or Ordered, by material | LightBurn documents it for variable-depth (3D) engraving on CO₂. Dither for portraits. |
| Fiber galvo (20 to 60 W) | Dithered modes for tone | For real depth, use the galvo-only 3D Sliced mode with a depth map. |
| UV | Dithered modes only | Not compatible in LightBurn. Power locks at 20% and the image comes out as a flat gray block. |
LightBurn's Image Mode reference describes each option this way:
| Mode | What it does | Use it for |
|---|---|---|
| Threshold | Each pixel is simply on or off | Files already dithered elsewhere. Never raw photos. |
| Ordered | Shading from a regular grid of dots | Large solid fills. Trotec also favours ordered dithering for soft portraits on acrylic and anodised aluminium. |
| Atkinson | Preserves detail, weak in very light and very dark areas | Graphic, high-contrast images |
| Dither | Error diffusion with no obvious pattern | Photos and smooth shading |
| Stucki | Photo dither, slightly faster than Jarvis, weaker in mid-tones | Photos, detailed subjects |
| Jarvis | Generally the best choice for photos, handles mid-tones well | Portraits and pets |
| Newsprint | Larger spots in darker areas, visibly patterned | A deliberate printed look |
| Halftone | Like Newsprint, with adjustable cells per inch and angle | High-DPI machines |
| Sketch | Engraves only hard edges | Line drawings and handwriting |
| Grayscale | Varies power between Min and Max Power | Diode shading, CO₂ depth |
The differences between the photo modes come from how each one spreads rounding error. Floyd–Steinberg (the name Epilog and Trotec use for basic error diffusion) pushes each pixel's error to four neighbours. Jarvis spreads it over twelve pixels across two rows, which is why it looks smoother. Stucki is a faster adjustment of Jarvis. Atkinson passes on only three quarters of the error, which keeps it crisp but washes out bright and dark areas.
If you dither outside LightBurn, import the file at its exact size and switch on Pass-Through, which engraves the pixels as they are. Otherwise the software resamples an already-dithered image and the dot pattern breaks into blotches.
Material notes: wood, slate, anodised aluminium, leather and acrylic
Wood
Choose pale, even-grained species such as maple, birch or basswood. Dark or strongly figured wood competes with the image. Trotec's rule for photos is that less is more: about 10% less power than a standard engraving on the same material, so the surface is only lightly marked and the dots stay separate. LightBurn's guide suggests running scan lines perpendicular to the grain. Species and finishing are covered in the cutting board guide.
Slate
The laser turns dark slate pale gray, so the picture is drawn in light. Enable Negative Image, which LightBurn documents as the setting for slate and glass, or the result is a photographic negative. See the slate and stone guide for stone types and settings.
Anodised aluminium
This is the sharpest photo material because the dot does not spread. It needs little image correction, a high resolution and an inverted image on dark anodising. Bare aluminium is a different job that needs a fiber laser. The metal engraving guide covers which laser marks which metal.
Leather
Trotec groups leather with wood and glass as a difficult material that suits error diffusion. Use pale vegetable-tanned leather only. Chrome-tanned hides and PVC-based faux leather release harmful fumes and do not belong in a laser. The leather guide explains how to tell them apart.
Acrylic
Cast acrylic frosts white, extruded acrylic stays nearly clear, so photos need cast sheet. On black acrylic, invert the image. On clear acrylic, engrave the back and mirror the artwork. A blue diode passes straight through clear acrylic, so this is CO₂ territory. More in the acrylic guide.
Whatever the material, run extraction, never leave the machine unattended, and wear eye protection rated for your laser's wavelength if the beam path is not fully enclosed.
Can you laser engrave a photo on glass?
Yes, directly with a CO₂ or UV laser, and with a blue diode only if you add a coating. Glass absorbs the CO₂ wavelength and frosts. Diode light passes through clear glass, so xTool's glass guide recommends marking paper, paint or a dark backing to trap the heat, with 300 to 500 DPI and an inverted image.
For CO₂, Trotec's engraver handbook recommends 500 DPI with ordered dithering, and 70% gray in place of pure black so less heat reaches the glass. It also describes laying a single damp paper towel flat on the surface, with air assist off, for a whiter and smoother mark. Inexpensive cast glass is the safer choice. Hand-blown crystal can carry internal stress and crack.
When should a photo become a 3D relief instead?
When you want the subject to have physical depth, as on a coin, a carved plaque or a deep wood portrait, a 2D burn is the wrong process. A photo engraving records brightness. A relief records height. Dark hair is not further away than a pale cheek, so feeding a normal photo into a depth process produces a face-shaped crater.
Relief needs a depth map, an image where each gray value means a height. LightBurn's Grayscale mode can carve variable depth on a CO₂ laser, and its 3D Sliced mode does it in passes on a galvo. DepthGen Pro generates that depth map from a photo offline and exports 8-bit or 16-bit PNG and STL. The 8-bit versus 16-bit guide explains which export a given job needs.
What is Imag-R and do you need it?
Imag-R (the site styles it ImagR) is a browser-based service that prepares photos for laser engraving: you upload an image, choose a material preset, and download a PNG or a LightBurn project file. You do not need it, but it removes the manual steps. According to its FAQ at the time of writing (November 2026), three images a day are free without an account and unlimited use starts at $19 a month.
It is an automation of the workflow above, with presets for wood, slate, tile, glass, acrylic and other materials. The alternatives are LightBurn's built-in Adjust Image window, which is already paid for if you own LightBurn, and a free browser converter. None of them replaces the material test, because no preset knows your focus, your power or your particular board.
Common photo engraving failures and fixes
| Symptom | Likely cause | Fix |
|---|---|---|
| Muddy mid-tones | Scan lines overlap, or too much power merges the dots | Widen the line interval, drop power or raise speed, lower gamma to lighten mid-tones |
| Visible lines or banding | Interval wider than the burnt line, or a dithered file resampled a second time | Rerun the Interval Test, use Pass-Through for pre-dithered files, check belts and focus |
| Washed-out faces | Highlights are pure white and receive no dots, or Atkinson is dropping light tones | Pull the white point down so skin carries a light raster, switch to Jarvis |
| Burnt, blocked shadows | Dense dot areas overheat, or the head is still accelerating at line ends | Lift the black point, reduce power, enable overscanning on machines that support it |
| Soft or doubled detail | Upscaled source, poor focus, or bidirectional scan offset | Use a larger original, refocus, tune Dot Width Correction and scanning offset |
Change one variable per test. LightBurn's five-step image guide fixes them in a deliberate order: focus, speed and power, line interval, dot correction, and only then the image itself. If the first four are wrong, no amount of image editing rescues the result.
The short version
Size the photo to the job, set resolution from the line interval your laser and material can hold, and shape the tones before you dither. Use Jarvis or Stucki unless the material gives you a reason not to, invert for anything the laser lightens, and under-power the burn. When the goal is depth instead of tone, stop adjusting the photo and make a depth map.
Sources
- LightBurn Documentation: Image Mode
- LightBurn Documentation: 5 Steps to Perfect Image Engravings
- LightBurn Documentation: Interval Test
- Trotec Laser: 3 steps to the perfect photo laser engraving
- Trotec Laser: Photo Engraving Tips & Tricks (PDF)
- Epilog Support Center: How Image Resolution Affects Engraving Quality
- xTool: How to Transfer a Photo to Glass
- Tanner Helland: Image Dithering, Eleven Algorithms and Source Code