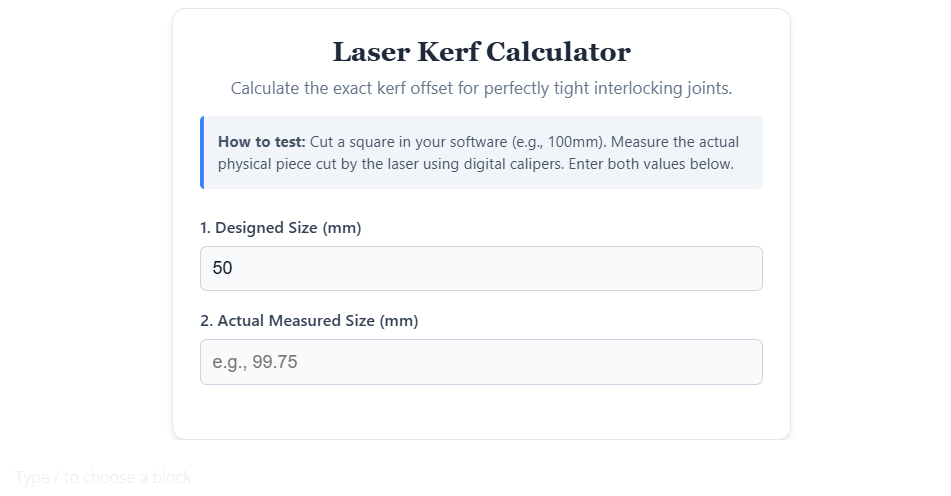
Laser Kerf Calculator
Calculate the exact kerf offset for perfectly tight interlocking joints.
What is Laser Kerf? (And Why Your Boxes Don’t Fit)
If you have ever downloaded a free SVG file for a laser-cut box or a 3D puzzle, cut it out, and found that the pieces fit together loosely or simply fall apart, you have experienced the problem of uncompensated laser kerf.
In digital fabrication, kerf refers to the width of the material that is burned away by the laser beam (or removed by a CNC end-mill) during the cutting process.
Even though a laser beam is incredibly thin (often between 0.08mm to 0.15mm for modern diode lasers), it still removes physical material. If you design a peg to be exactly 10mm wide, and a hole to be exactly 10mm wide, the laser will cut directly on the line, burning away a fraction of a millimeter on both sides. The resulting peg will be slightly smaller than 10mm, and the hole will be slightly larger. The result? A sloppy, loose joint.
The Mathematical Solution: Kerf Offset
To get a perfect, friction-tight press fit without needing wood glue, you must tell your software to cut slightly outside the line for solid objects, and slightly inside the line for holes. This is called the Kerf Offset.
Instead of manually editing your vector nodes in Adobe Illustrator or Inkscape, modern software like LightBurn has a built-in feature to handle this automatically. But first, you need the exact mathematical value.
How to Calculate Your Exact Kerf
Your kerf changes based on the machine you use, the lens focus, and the specific material (acrylic burns differently than plywood). You should always measure your kerf when starting a new batch of material.
Step-by-Step Guide:
- Draw a simple square in LightBurn (e.g., exactly
100.00 mmwide). - Cut the square out of your target material.
- Use a high-quality digital caliper to measure the actual physical width of the cut piece. (Let’s say it measures
99.75 mm). - Use the Voxelase Kerf Calculator above. Enter the designed size (100) and your measured size (99.75).
- The calculator will provide your Kerf Offset.
How to Apply the Offset in LightBurn
Once you have copied the value from our calculator:
- Open your project in LightBurn.
- Double-click the layer/cut setting you are using for your interlocking shapes.
- Look for the setting called “Kerf offset”.
- Paste the value generated by our tool (make sure the value is Outward so it adds material back to your shapes).
- Run your cut, and enjoy perfectly tight, professional joints!
Note: For extremely tight joints, you can add an extra 0.02mm to the calculated offset to ensure maximum friction.